Tuesday, June 26, 2012

My pallet project


There are so many great ideas of how to re-use pallets out there.  But a lot of them require dismantling the pallet, which is more dificult than it may look. Trust me, I've done it.  Often pallets are not in the best condition and the wood splits, cracks, breaks, easily.  Often times the nails holding it together are unneccessarily huge. Or rusted. Or bent horribly.  More often than not, a project that you thought would take an hour or so, ends up taking the whole day, most of your pride and a piece of your  dignity along with it (I found myslef pleading with an inanimate object to please, please release the nails into my custody. I promised to give them back!) So after my first project which was of the "dismantle/reassemble" sort, I decided my next one would be more of the "put it where I want and leave it" sort.  So after getting a great idea from a friend, I leaned my pallet against a nice sunny wall, and rested some terra cotta pots I found in our shed in it.  I filled the pots with a bit of potting soil and herbs, ivys and vines.  It looks great, but after our many days away, no rain for weeks and some of the hotteset weather Indiana has ever seen, it's looking a little sad.  These pictures are taken immediately after potting the plants so some may look a little wilty due to being transplanted. 

This is a great way to keep all your herbs in one area, it's a huge space saver, and it creates an interesting wall display.

Caprese Salad, so easy so YUM!


We've had a crazy few weeks! One weekend we drove 11 hours to Philadelphia, the next we were visiting family in Michigan. This weekend we plan on travelling again.  We've been living out of a suitcase as much as we've been home.  We've also been living off leftovers from my nephew's graduation.  The food was fantastic, and I really didn't even mind eating it three days in a row, it was THAT good! But by the third day, I just needed something fresh to add to it. Something simple, summery, and easy. Not to mention the tomatoes on our counter were starting to go bad in a few spots and needed to be used up.  So I cut off the yucky parts and used 'em up! The basil is from our garden, which is really starting to produce now.   

This is such an easy salad, you can make it even easier by buying fresh mozzarella, but I love to make mine.  As soon as it's done I drop it into ice water for a minute or so and then toss it into the salad. It only takes 30 minutes (less time than it takes to go to the store with 2 kids in tow) 30 minute mozzarella recipe.

CAPRESE SALAD
5 or 6 medium-large ripe tomatoes (whatever your preference, ou can use roma, beefsteak, yellow pear or even a lot of cheery or grape tomatoes) chopped into large chunks
a handful of fresh basil sliced into thin strips
fresh mozzarella (3/4 of the batch if you make your own, probably about a whole pack if you buy it at the store)
balsalmic vinegar
extra virgin olive oil
salt and cracked black pepper to taste

Toss your tomatoes, cheese, and basil in a bowl. Drizzle lightly with olive oil and vinegar.  Sprinkle with salt and pepper. Lightly toss. Enjoy!

I like this salad best at room temperature.  I find that keeping tomatoes in the fridge causes them to become mealy and lose a lot of flavor.  We keep ours on the counter.  They keep just as long and have a better taste and texture.  In a salad thats primarily tomatoes, you really want them to taste their best. 


Sunday, June 10, 2012

Ice Cream That's HEALTHY?????!!!!!!!


Yup. You read that right. Seriously. Put it this way, I'm really particular about what I feed my kids.....and I gave it to them FOR BREAKFAST! And I had a bowl myself.  The reason it's so healthy? The only ingredient is bananas. 

Ice Cream. Breakfast Of The Champions!

I love bananas, but sometimes I forget to eat them. Or sometimes I buy too many. So I end up making banana bread (which I have devised a healthier version of and will post soon) but it's not the healthiest thing in the world.  So when I found this recipe I was super excited!  I was amazed by the texture. It comes right out of the food processor with a texture like soft serve.  (You can put it in a container and freeze it too.  Just let it thaw a few minutes before scooping.) It is very creamy, and so much like real ice cream that my husband kept asking "This is really just bananas?". Yup. Just bananas. It's not as strong of a banana taste as you might expect, but if you're not a fan I came up with a few quick "fixes" that completely change the taste and are so yummy. 

BANANA "ICE CREAM"
3 or more ripe(slightly spotted) bananas

Cut your bananas in slices on a plate or tray.  Put them in the freezer for an hour or so.


Put your banana slices in the food processor.  Blend. It will start to look a bit like gravel.  You may need to stop once or twice to scrape down the sides.


It will all of a sudden start to come together, and them it will become this smooth, creamy whipped texture. Scoop and EAT! That's it!

And that's what I gave my toddler for breakfast! My daughter got some too.  But I wanted to try another version, so we tried adding a few ingredients to the ice cream that was remaining in the food processor.

CHOCO PEANUT VERSION(Add to banana "ice cream")
1 tbsp natural peanut butter (creamy or crunchy, either would work)
1 tsp cocoa powder(unsweetened)
When your ice cream is ready, just toss these ingredients in the food processor as well and blend till well mixed.


That was my favorite version of it.  It had the most "ice-creamy" texture, taste and overall feeling. It could definitely replace regular ice cream for me any day of the week and I would be a happy camper. This recipe, in a cone would taste just like the real thing. I forgot to take a pic of this variation.....I think that speaks to how delicious it is, and how it really did not last!


The other version was more of a fruit smoothie version. Because of the added liquid it was runnier, and not nearly as creamy.  It was like eating a heavy smoothie. Still great, but not as satisfying.  But definitely more of a healthy, breakfasty taste.  Funnily enough, this version has more sugar than the choco version!

FRUITY ICE CREAM VERSION(Add to banana "ice cream")
1 1/2 cups frozen strawberries(I used fresh, just popped them in the freezer when I put my bananas in, so they weren't frozen hard)
1 cup mango puree(sweetened...that's where the extra sugar came in)
When your ice cream is ready, just toss these ingredients in the food processor as well and blend till well mixed.

For this you could really use any fruits or berries you want! Just put them in the freezer when you put the bananas in so that they will not make it too runny. (Mango puree tastes good, but really made it liquidy) It may have also had something to do with the fact that it was 90 something degrees in our house when I made this version....versus the 70 something when I made the other version...hmmm.


Runnier, but still sooooo good!

I did eat a good sized bowl of this version, and loved it! But I saved a lot to put in a container in the freezer. I'm hoping it will firm up a bit and will be more like sherbet. We shall see. Either way, I know it won't go to waste since everyone in the house was a fan. 

This has to be the simplest, fastest recipe ever! And I love that I can eat ice cream every day now and not worry about sugar or fat content.  Try it. You'll be very pleasantly surprised!


Friday, June 8, 2012

Quiche


I love quiche, but we don't eat it as often as I would like because my husband is not a huge fan of eggs. So anytime he has to work late or has other plans, this is our dinner! And then breakfast and lunch the next day too.  I love that I almost always have some sort of combination of ingredients that will work for this.  I can make it as fancy and gourmet as I want with brie and mushrooms and dijon, or simply use a block of frozen spinach and some shredded cheddar cheese. I have always used the frozen premade pie crusts, because they were so easy and the ingredients were pretty minimal.  (This is for the frozen ones only, the refrigerated ones use lard. Gross.) But we didn't have any and I figured it's about darn time I figure out how to make a good pie crust from scratch. I've tried many times before to no success. But my friend Renae just recently told me that you're not supposed to mix it all the way, the chunks of butter are what make it flaky. Ooooooohhhhhhh, so that's what I did wrong. Armed with this new knowledge, I used my All Recipes app on my phone and found the simplest one possible.  I tweaked it a bit because as I was mixing there just was not enough liquid to pull it together. (It called for 1/3 cup water. I used more like 3/4 cup). It was my first really great homemade pie crust. And the recipe made two so there is still one waiting in the freezer. Even better!

SPINACH AND CHEESE QUICHE

THE CRUST
1 cup butter, chilled
3 cups all purpose flour
3 tbsp white sugar
3/4 cup ice water

Combine flour and sugar in bowl.  Cut butter into tablespoon size pieces.


Add butter to the flour mixture, use a pastry blender to cut the butter and flour together.  It should remain pretty lumpy. While stirring the mixture with a fork, slowly add the water(You may need less, so add a small amount at a time, starting with about 1/4 cup) Stir gently not to really blend the ingredients, they should come together but not be an even mixture. When it starts to clump, but before it forms a ball, stop stirring.  Lightly form into two balls.

Wrap each ball in plastic wrap and chill in the freezer or fridge for about 30 minutes.

While you are waiting for the crust to chill. Prepare the innards of the quiche. I only had frozen spinach, some onions and cheddar cheese on hand. So that's what I used.

QUICHE FILLING
1 block frozen chopped spinach
1 yellow onion, chopped
1 tbsp olive oil for sauteing
1 tbsp chopped garlic
salt and pepper to taste

Defrost and squeeze the moisture out of your spinach while you are sauteing your onion.  Once the onion becomes translucent add spinach, garlic, salt and pepper.
Cook until the spinach begins to lose a bit of its "green-ness"

THE EGG MIX
4 eggs
1 cup milk
2-3 cups shredded cheddar cheese(depending on your love of cheese)
1/4 cup shredded cheddar cheese, reserved for the top
Pepper to taste (I find the cheese has enough salt for me, but if you like salt you may want to add a bit in to this mixture as well)
Beat the eggs with the milk. Stir in cheese.  Season with pepper.
Now you are ready to roll out your crust. If you have wax paper, do it on that. Save yourself a headache. I didn't. Lay a big piece of wax paper on the counter.  Roll out your pie crust on top of that.  Roll as little as possible, so the butter pieces remain in pieces.


 Turn over into a glass or metal pie dish. Pinch up the edges of the crust. It's very forgiving if you need to grab some from one side to add to another. I don't worry about it looking too nice, but I like it kind of high so I can really pile my ingredients in.


Spoon your spinach mixture into the crust.  Pour the egg mixture on top, making sure you don't over fill.  (Egg that spills over the edge of your crust and burns in the bottom of your oven will smell terrible!) Use a fork to gently mix the spinach with the egg. Sprinkle a little extra cheese on top. Put in the oven at 375 for 45 minutes.  If you are worried about it spilling, put a cookie sheet under your pie dish.


Let stand about 10 minutes before cutting, to ensure the pieces actually hold up.  Enjoy!  Noorah LOVES her quiche!


Quiche is such a forgiving dish. You can really add whatever you like depending on your tastes, or like me, whatever you need to use up before it goes bad.  I love it with broccoli, mushrooms and feta. Ricotta is great in it, as it goat cheese. If you do brie, lay a few slices on the bottom of the crust then slather with dijon.  Add veggie and egg mix.  Bake for 15 minutes, add some brie strips to the top then bake for another 30 minutes.  After you get it right once, experiment, try new combinations.  And good luck!


Tuesday, June 5, 2012

Margherita Pizza


Now here's where all these homesteading skills, or whatever you like to call it, come in handy. You can begin to combine techniques! I was in the mood for a quick and easy dinner-PIZZA.  But since we've essentially "cut the crap" from our diet, regular pizza just does not appeal to me anymore. Homemade pizza is still pretty quick and easy. It takes a little more time, but with the help of my handy dandy breadmaker ( and yes I just said that in Steve from Blues Clues' voice) it isn't much effort.

We have a lot of fresh basil in our garden, so I was really craving a margherita pizza.  Simple, perfectly matched ingredients.  Basil, fresh mozzarella, ripe tomatoes and a crispy crust.  Problem was, I was out of mozzarella. Oh well, I could make more!

So, I tossed the crust ingredients in the breadmaker.  Here's my Basic Pizza Dough Recipe

And I got to work on the Mozzarella

The cheese was done before the dough! So while we waited for the dough to rise, Noorah and I headed to the garden to pick some basil. 

By the time we came in, the dough was ready.  We rolled out our dough into two crusts and got it in the oven. As it was baking we sliced our tomatoes, cheese and basil (and ate quite a bit of cheese and tomatoes in the meantime) 

We topped our pizzas and sprinkled with a little cracked black pepper, and just popped it back in the oven just long enough for the cheese to get melty and the tomatoes to get warm. 

When they came out, I did a quick drizzle with extra virgin olive oil and that was it! It was delicious, the cheese just melted in my mouth, the tomatoes were sweet and earthy.  I love fresh bread in any form, so it was a win/win/win for me! The only change I would have made....I should have waited until the pizza was out of the oven to add the basil. It got a little wilted, a little dry. But still pretty tasty.  And a healthy meal that I am proud to serve my family!

I know, this is not what most people would consider convenience food. And it certainly isn't. But it was less than an hour of work, which my daughter and I did together.  When she asked why we were making the cheese, I replied "Because we try not to buy things that we know how to make at home".  I am trying to teach her to be self reliant in a variety of ways, and I know it sounds silly, but there is a sense of accomplishment when you are able to take a gallon of milk and turn it into cheese, or yogurt.  I try to live and teach this self reliance on a variety of levels.  We have a food garden, where we grow vegetables and herbs.  Most of them aren't ready yet(being early June) but we try to use the ones that are.  We planned the garden on our own eating habits and personal tastes.

Food isn't meant to be a convenience. Yes it is a necessity,  but the quality of that food can seriously impact your life.  And its not only about nutrition labels.  It is a whole process - growing food, preparing food, serving food and eating food.  The more tasks in this process that we can do ourselves, the more control we have over the quality. And the more we get to watch our children light up and realize "I can do that!" when they help roll out some dough or pick a tomato.


Basic Pizza Dough

The Dough
2 cups white bread flour
1 cup whole wheat flour
2 1/2 tsp bread machine yeast(I use it for everything)
2 tbsp sugar
1 tsp salt
1/4 cup Extra virgin olive oil
1 1/2 - 2 cups water (play around, it depends on your flour and the humidity)

You can also make this dough in the bread machine, if its free.....

Put all the ingredients in a large bowl (I use a large wooden salad bowl because its nice and wide and gives me lots of room to knead).  Mix it until it forms a nice ball, it should be stick but not messy.  Add a bit of flour or water until you get it where you want it.  Knead for 5-10 minutes until its smooth and elastic. Take the dough out of the bowl, and put a small amount of olive in the bowl(just enough to lightly coat the bread) Throw the dough back in, rolling it in the oil to coat.  Put a piece of plastic wrap lightly over the dough, and then a towel.  Find a warm spot for the dough to rise.  I put mine on top of the water heater and run a load on hot in the washer.  It seems to work pretty well and is a good incentive to do a load of laundry.  If you don't have a nice warm place to let your dough rise, a heating pad works well. You can do it in the oven if you're really in a rish, but put it as low as it will go and maybe keep the door cracked.  Anything abouve 140 can kill the yeast.  Yeast will rise, even without the warm area, it just rises much quicker with it. If it's a warm day a sunny window, or in my case, just out on the deck, works great.

After the dough has doubled in size, divide it in two and roll out both halves on a floured surface.  Keep its as thick or thin as you like (but remember it will puff back up so i reccomend between 1/4 to 1/2 inch thick) lay each crust on a baking sheet and cover with a towel to rise a bit while you preheat the oven to 425. No need to find a warm spot, i just lay it on the counter, or the stove.  After it has risen for about 10 minutes, use your fingers to poke in all over the dough like foccaccia bread.


Bake till it starts to get golden brown and crispy, keep an eye on it, all ovens are so different. I bake one crust at a time, they just seem to bake more evenly that way.  While the second one is baking, I do all the toppings on the crust that's already done.


Add whatever toppings you want, and pop back in the oven until they are warm and melty. 


Sunday, June 3, 2012

30 Minute Mozzerella

My new favorite thing!

If you want to make something that will wow the pants off your dinner guests, or just yourself, this is it.  I always wanted to try cheesemaking. It sounds so much more involved when you say "cheesemaking" rather than just "make some cheese". I don't know why.  Anyways, I was always a bit intimidated by actually making cheese at home.  I had thought of buying a cheesemaking kit, but  I figured I probably had all the tools I needed already, or could make do. So I used a recipe I found on Pinterest, seemed easy enough, only a few ingredients (2 of the three i had to make a special trip to buy, but what the heck, I was excited about this cheese project!).  All of the recipes I found were slightly different, but funnily enough, they almost all credited the same original recipe, Ricki Carrol's book, Home Cheese Making. 


30 MINUTE MOZZERELLA
1 1/2 level teaspoons citric acid dissolved in 1/2 cup cool water
1 gallon pasteurized, NOT ULTRA PASTEURIZED whole milk (raw milk from a safe source is ok, as well as 2% or 1%)
1/4 teaspoon liquid rennet (or 1/4 rennet tablet) diluted in 1/4 cup cool, unchlorinated water (I just used water from our filter pitcher, it seemed fine to me)
1 teaspoon salt (optional, I used kosher salt)

I found the citric acid and renet at our local health food store(renet was vegitarian variety).  I had to ask where it was though, and even the woman who worked there was having a bit of trouble finding it. The citric acid was in the baking aisle and the renet was in the refrigerator with the cheese. Your store may be different, but just a hint if you're having a hard time. It's also available online.

Starting to curdle

Gently heat the milk to 55 degrees in a large stainless steel pot. (Being used to making yogurt, I forgot to watch the thermometer closely and before I knew it the milk was 80 degrees!! Oh well, I proceeded like normal anyways!) Add the citric acid solution while stirring. 

Heat the milk to 90 degrees over medium to low heat, stirring constanltly.  Take the pot off the heat.  Add the renet mixture while stirring in an up and down motion, then cover and let the pot sit for 5 minutes. 

After five minutes, check the curd.  It should be custardy with a definite difference between the curds and whey.  If it's too soft or the whey is too cloudy, let it sit a few more minutes.

Cut the curd with a knife that goes all the way down to the bottom of the pot.

Cutting the curds

Return the pot to the heat, and bring to 105 while stirring gently. Remove from the heat and continue to stir for 2-5 minutes. 

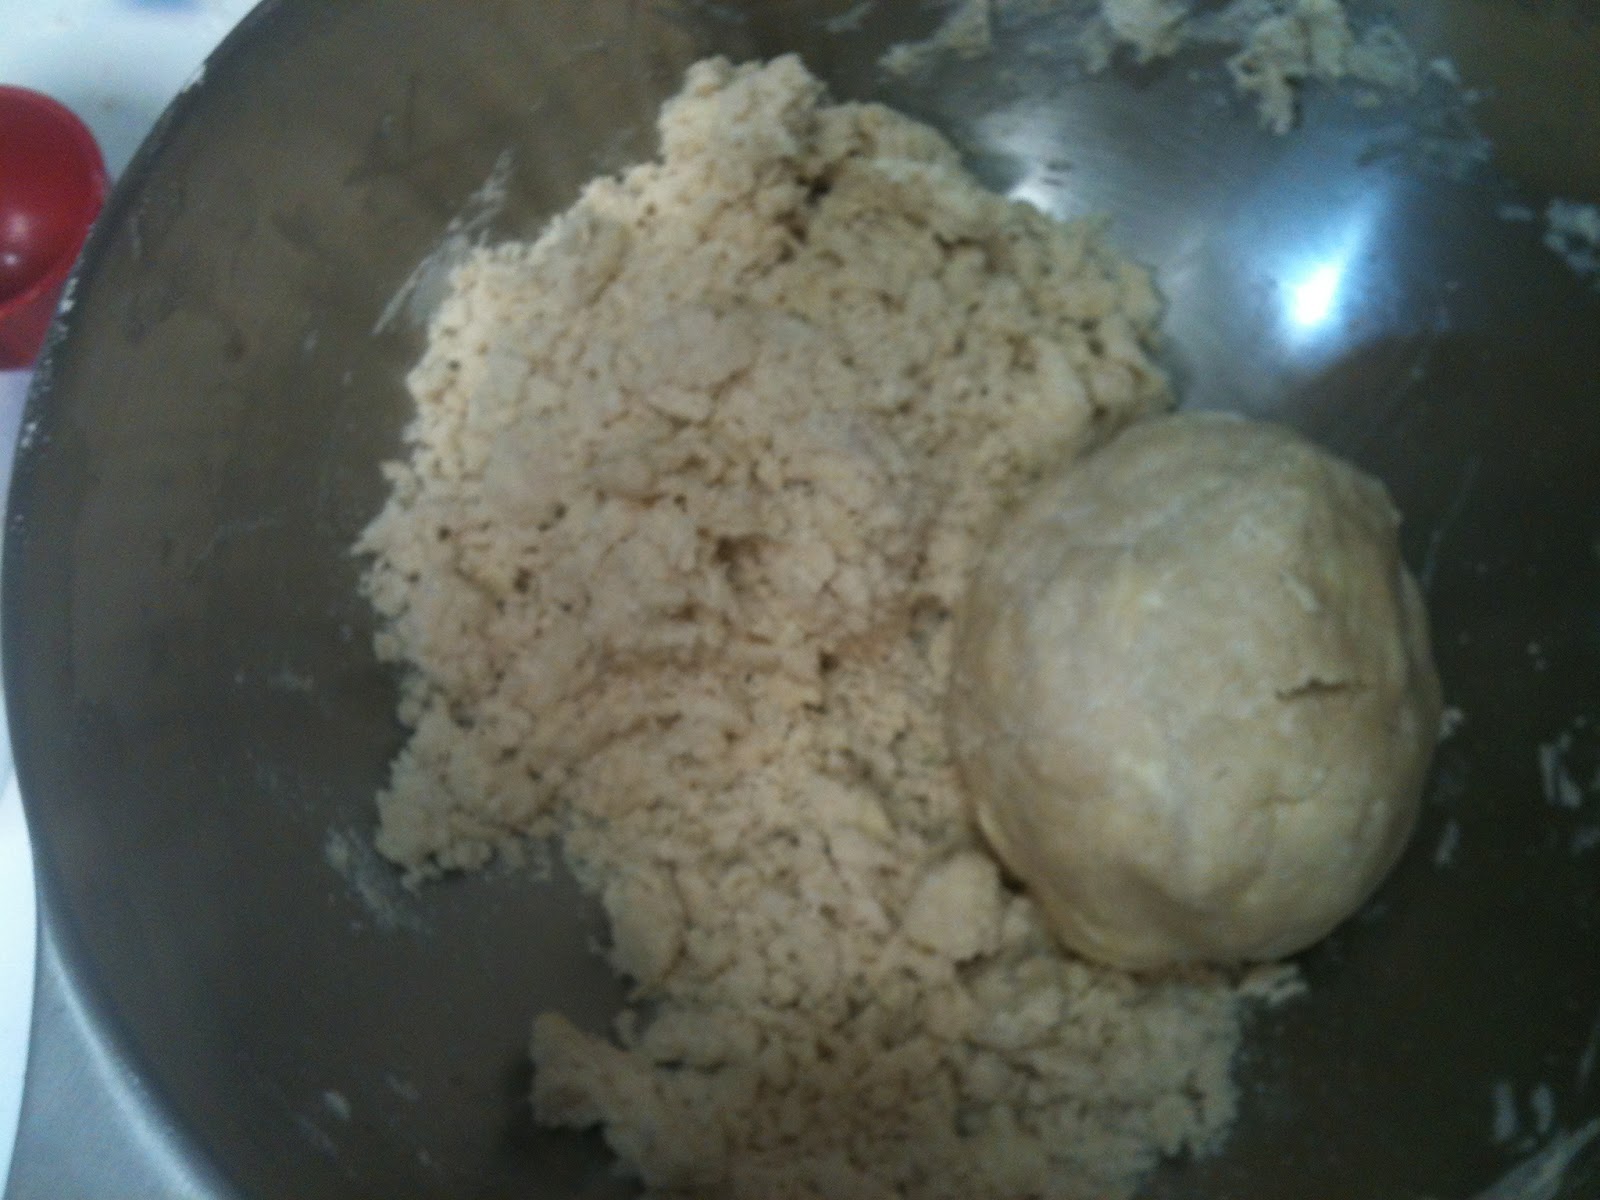
 With a slotted spoon, scoop out the curds and place them in a microwave safe bowl.  Use your hands to press off as much of the whey as possible. It still seemed wet to me, so I scooped up one handful at a time and packed it just like I would a snowball. It got much drier that way. Pour the whey back into the pot and put your snowballs into your microwave safe bowl. Mash them all together.

Scooping out of the pan

In the microwaveable bowl(straight out of the pan) and then my "snowballs"

Microwave on high for 1 minute.  Remove and knead with a spoon or your hands.  This will distribute the heat evenly.  It will be hot, a pair of clean rubber gloves can be very helpful(wish I had a pair!)

Microwave two more times for 35 seoconds each.  If you want to add salt, do it after microwaving the second time. After it comes out of the microwave each time, knead to distribute heat.  I actually had to microwave it two more times after that, and as I was kneading it I found it just wasn't coming together. It seemed more of a ricotta texture rather than gooey and smooth. But that was because I was kneading it with a spoon it seemed....I sucked it up and used my hands to do it and it smoothed right out. I didn't have gloves, and don't get me wrong, it kind of hurt. But when the heat got to be too much I switched to the spoon and then back to my hands again. It should be smooth and shiny and stretch like taffy.  If it breaks or tears its not hot enough yet-back into the microwave it goes!  Stretch it and fold it back on itself until it's nice and smooth. Stretch it nice and long, at least a foot or two if you can. It makes the texture really nice, then fold it back on itself and do it a few more times.

I chose to make mine into little balls, although you can leave it in one big mass, or braid it.  It's great to eat warm, but if you're going to refrigerate it, make your shapes and drop into a bowl of cold water to cool quickly. This helps keep a smooth texture.  Then put them in a tupperware or pyrex with some water and refrigerate. I'm really not sure how long these will last in the fridge because ours lasted less than three days. Granted I did give some to my sister, but if I hadn't done that, they may have made it a few more hours. 

Pinching off into balls

Drop into cold water to cool quickly

Store in a sealable container in the fridge with some water (you can lighlty salt the water-2 tsp salt to one cup water if you like). 

This cheese is delicious, very smooth, mild and just chewy enough!  As soon as my basil starts growing, I start thinking caprese salad, tomato/basil/mozzarella paninis, fresh pizza....the list goes on and on.  Fresh mozzarella is soooo much better than the dry shredded stuff in the bag (though I don't actually turn my nose up at any cheese) but paying $5-$7 for a little ball and having it gone in minutes....I'd prefer to spend a half an hour, have it fresh, and be able to proudly say "I made that cheese!" before I gobble it up! 


According to all the recipes/blogs/pins you should save the whey to make ricotta. I saved it, I followed the instructions. I failed miserably. I'm not sure what went wrong but it just did not work. The cheese didn't separate from the whey.....maybe I was overconfident from my mozzarella success. I don't know. But it really didn't work. Oh well, next time! Because I think I'm making this cheese again REALLY SOON!


UPDATE ON THE RICOTTA! IT WORKED!

Ok, I tried it again.  The mozzarella came out great, so time to try my ricotta again.
As soon as I finished my mozzarella, I put my whey back on the burner to try my hand at ricotta again. I decided that since following instructions got me nowhere, I would freestyle it. I'm not much of a stickler for the rules when it comes to food, and I figured it couldn't go any worse than the last time.  Instructions said to keep the whey on the stove until a foam appears, right before it boils, then take it off and strain it through butter muslin and wait 15 minutes. Well, I did that, and basically it all went right through. Nothing was there. So this time I decided to go past the point of "foam" which was only about 10 minutes, and just cook the heck out of it! It got foamy, I stirred it, I turned the heat up to a low boil, then down again.  I kept stirring occasionally, scraping the bottom making sure nothing was getting stuck. I would leave the pot for 15 minutes at a time, when it was on medium or low.  All in all, it cooked for a little over an hour.  I could see chunks of curd forming.  When I was pretty certain that there were definite "curds" and definite "whey" I slowly poured it through a clean kitchen towel (not a terry towel, but a smooth one, kind of just a cotton fabric, muslin would work well, cheesecloth isn't fine enough) that i had tied through the handles of a pot.  The whey drained through and my ricotta stayed! It doesn't make a whole lot of cheese. Not enough for a lasagna, maybe a cup and a half or two. But it was made from left over whey, that I otherwise had no use for.  I would't go out of my way to make this, but as a byproduct, it's a great thing.  It was delicious in scrambled eggs this morning and again in a spinach pasta bake for dinner. And now its gone. We ate it all in one day. I guess that answers your question of how does it taste!